Start With the Right Royal Icing Consistency
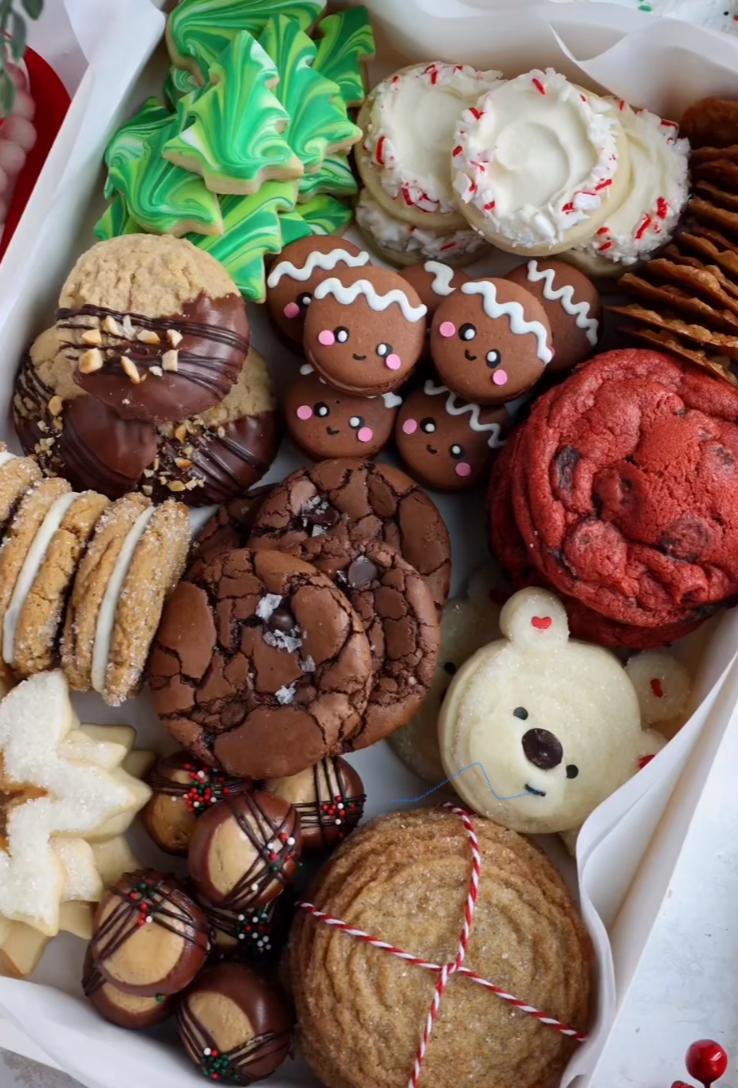
Decorating sugar cookies is one of my favorite things to do during the holidays. I grew up decorating cookies every Christmas, and now it's a tradition I share with my own son. Over the years, I've learned professional techniques that make cookie decorating easier, cleaner, and much more fun. Today I'm sharing those tips with you so you can create beautiful cookies at home—even if you're a beginner!
Royal icing is the base for most decorated cookies, but the key is using the right thickness for the right job. Professionals use multiple consistencies, but beginners can start with two:
- Thick Icing (Piping Consistency): This icing holds its shape, doesn't spread, and is perfect for outlining your cookie, designing borders, making lines, or adding details like snowflakes, lettering, and dots.
- Flood Icing (Thin Consistency): This icing is much thinner so it spreads easily inside the outline. After piping the outline, let it set for a few minutes, then use flood icing to fill in the cookie for a smooth, glossy finish.
Pro Tip: If your icing is too thick, add water a few drops at a time. If too thin, add more powdered sugar.
Outline Before You Flood
Outlining gives your cookie clean edges and prevents the flood icing from dripping off the sides. Once your outline is piped, wait 5–10 minutes before flooding. This helps create a strong "dam" to keep everything neat.
After you add the flood icing, gently shake or tap the cookie to help the icing settle smoothly. Use a toothpick or cookie scribe to pop air bubbles and drag the icing into tight corners.
Use the Right Tools
You don't need expensive equipment to decorate cookies beautifully—but a few tools make a big difference:
- Piping Bags: Disposable bags are easiest. You can also use tipless piping bags for delicate details.
- Piping Tips: #1–#3 round tips create clean, thin lines. Use these especially for lettering or intricate designs.
- Cookie Scribe or Toothpick: Helps smooth icing, fix lines, and pop air bubbles.
- Food Coloring: Gel colors are best because they don't water down your icing.
- Parchment Paper: Great for practicing lines, dots, and shapes before decorating your cookies.
Layer Your Designs
Professional-looking cookies often have multiple layers. Let each layer dry partially or completely before adding the next one. For example:
- Flood the base layer and let it dry fully before adding details.
- Add small decorations like polka dots while the flood icing is still wet for a "smooth blend" look.
- For dimension and raised details, wait until the first layer is fully dry before piping on top.
Allow Drying Time
After finishing your cookies, allow them to dry uncovered for several hours—or preferably overnight. This ensures the royal icing sets firm and shiny, making the cookies easier to package, gift, or store.
Final Thoughts
Decorating sugar cookies is a relaxing, creative hobby that brings everyone together—kids, family, neighbors, or holiday guests. With the right icing consistencies, tools, and a little patience, you'll be able to create bakery-quality cookies right at home. Happy decorating!